#18 腹圧-Abdominal pressure③
English follows Japanese
(Let me apologize in advance there might be some grammatical mistakes below.)
こんにちは。
ヨガインストラクターのuriです。
「腹圧」について考えるシリーズ、最終回です!
designed by freepik.com
◻️内腹斜筋・外腹斜筋とは・・・
体の回旋、姿勢保持をサポートする筋肉です。両者の異なる点は、その位置と筋繊維の向き。
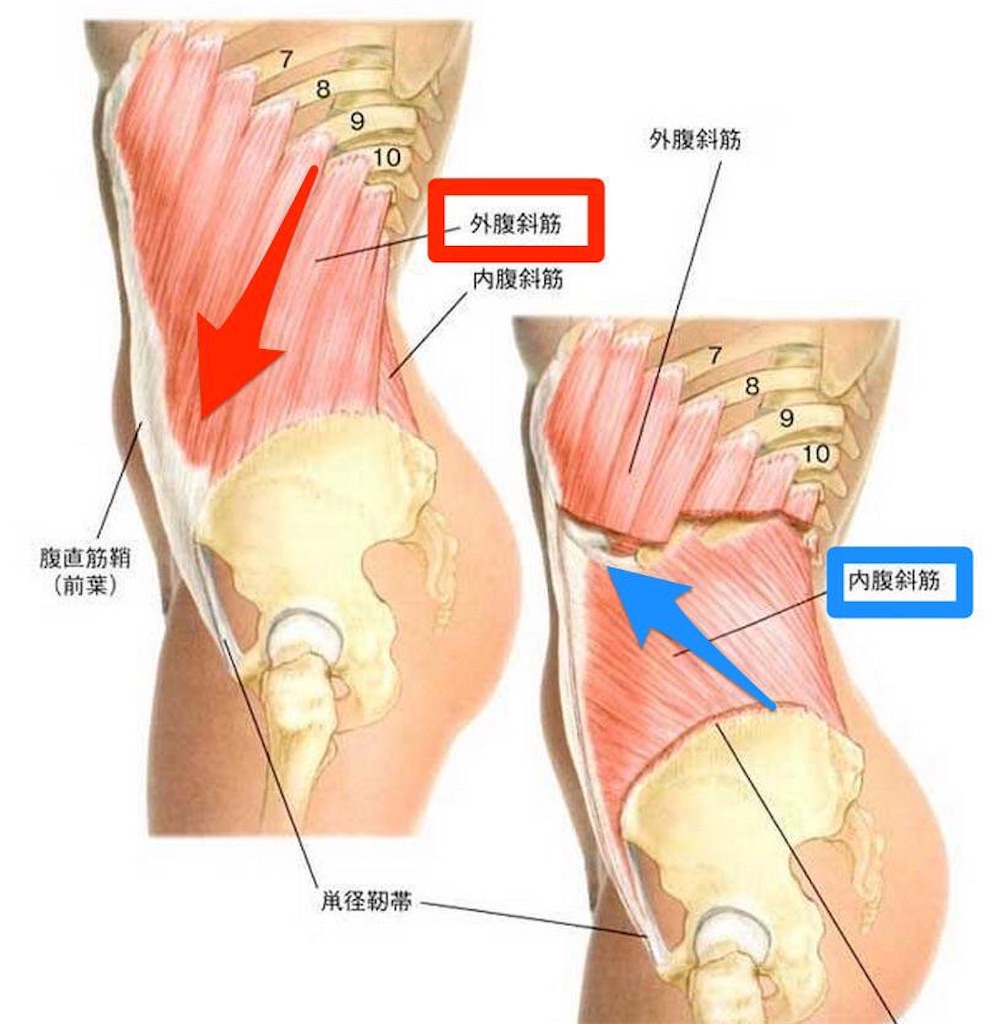
画像出典 解剖生理学勉強法.biz/kyouzai
「外腹斜筋」は腹部の全体を覆う表層筋であり、筋繊維は斜め下。「内腹斜筋」は腹横筋と外腹斜筋の間についている深層インナーマッスルで、筋繊維は斜め上。
(※11/14:筋走行が誤っていたため、訂正致しました。ご指摘ありがとうございます。)
内腹斜筋は脇腹を中心に巻き付くように存在しているため、鍛えれば綺麗なクビレが手に入るかも…!
◻️内腹斜筋・外腹斜筋を活性化するポーズ
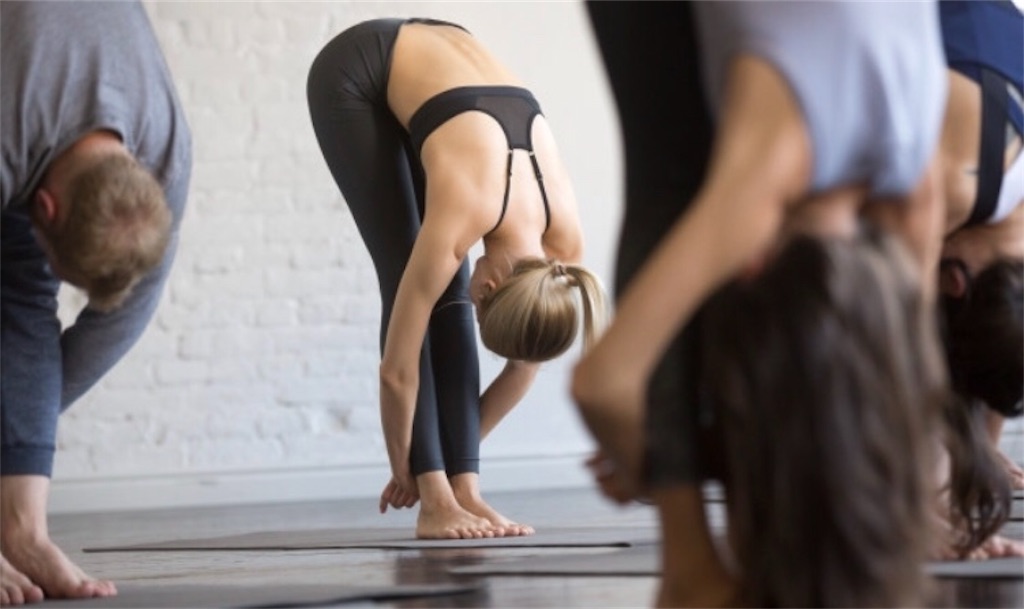
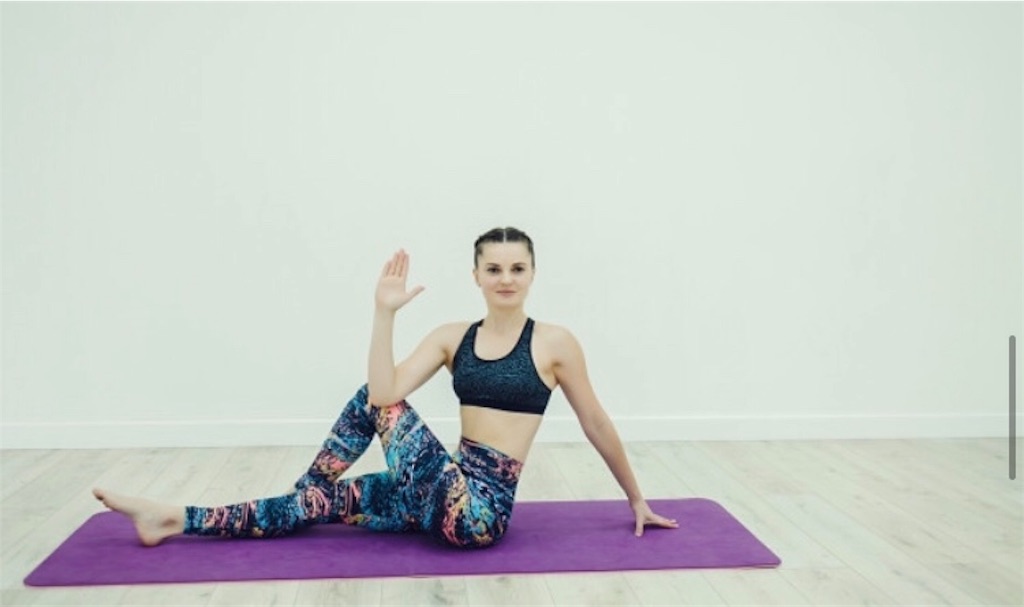
これらを活性化するポーズは、「屈曲」「捻り」「側屈」です。
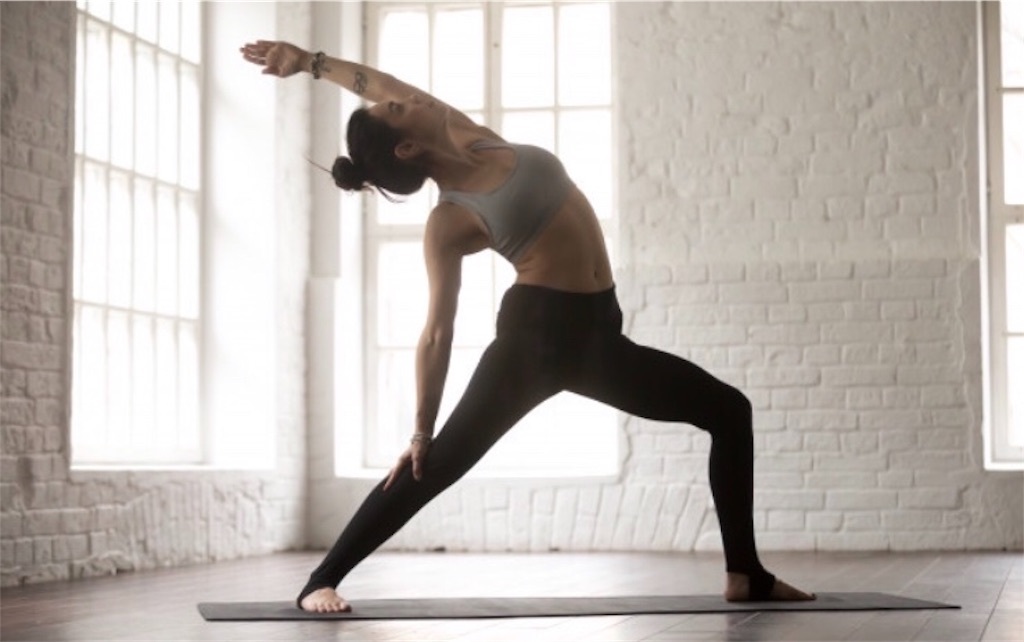
designed by freepik.com
◻️分かりやすい腹圧インストラクション
#16、#17と見てきたように、「お腹」と一言で言っても、様々な筋肉がありました。
「どこからどこまでの筋肉を、腹圧関連筋として認識しているか?」にズレがあると、インストラクションの受け取り方も変わってきそうです。
「お腹」という言葉に頼りすぎずに、こうした筋肉の連動を、分かりやすい言葉で伝えられたら…!
私は、腹圧を次のように解釈しました。「骨盤底筋から始まり、股関節部が下肢と体幹を適切にジョイントし、おへそ下から横隔膜あたりの各筋肉が、平らなコルセットとなるようなイメージ。」
以下の通り、インストラクションに落とし込んでみます。
❶左右の上前腸骨棘にそれぞれ両手をあて、股関節に小指側を添わせて面を作る。この面が床に対して垂直になるよう、尾骨を真下に向けるよう意識する。
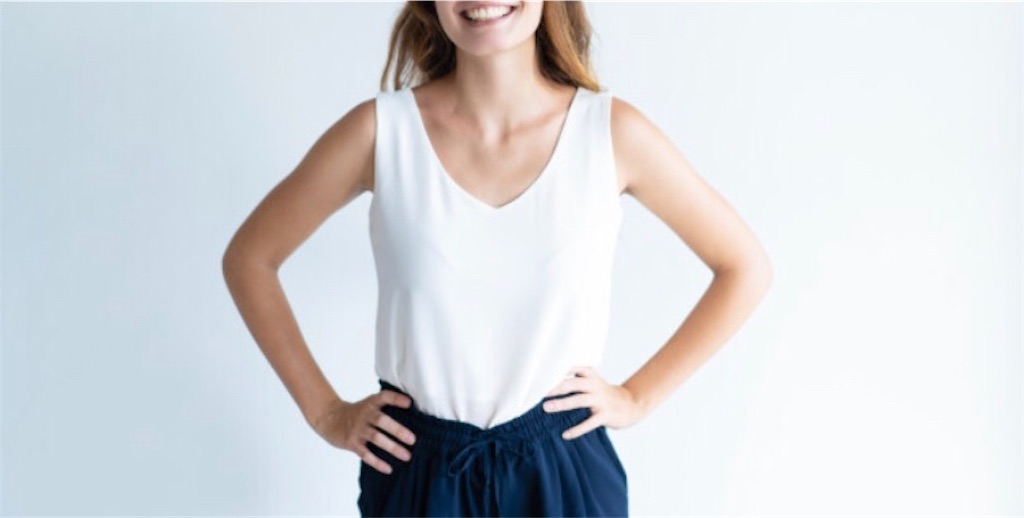
designed by freepik.com
❷その骨盤・背中の位置は固定したまま、股関節付け根からみぞおちまで「お腹全体」を背中方向に近づけるように体幹を薄くする。
❸そして両脇の付け根前側(ハミ肉の部分)が斜め上方向に引っ張られ、それに連動するように肩甲骨が下がり、胸が開くイメージです。(=肩甲骨の下制)
※僧帽筋群が弱い方(=巻き肩クセがある方)は、僧帽筋群が前方に倒れこみ、みぞおちが前にぽこっと出てしまうことがあります。(私は典型的なこのタイプで、みぞおちに余計な力が入っていました。)
…とはいえ、自分の感覚を言語化した部分が大きいので、果たして生徒さんにとってわかりやすいのかどうなのか…
ぜひ他の先生方のご意見を聞いたり、生徒さんの反応を伺いながら、より良いインストラクションを考え続けていきたいなと思います。
---------------------------------------------------------------
#18 Abdominal pressure③
Hello, everyone.
I'm uri, a yoga instructor.
This is the last part of series of "abdominal pressure".
designed by freepik.com
◻️Internal oblique & External oblique
They're muscles which help maintaining good posture and twisting your body. The difference between them is their positions and the direction of muscle fibers.
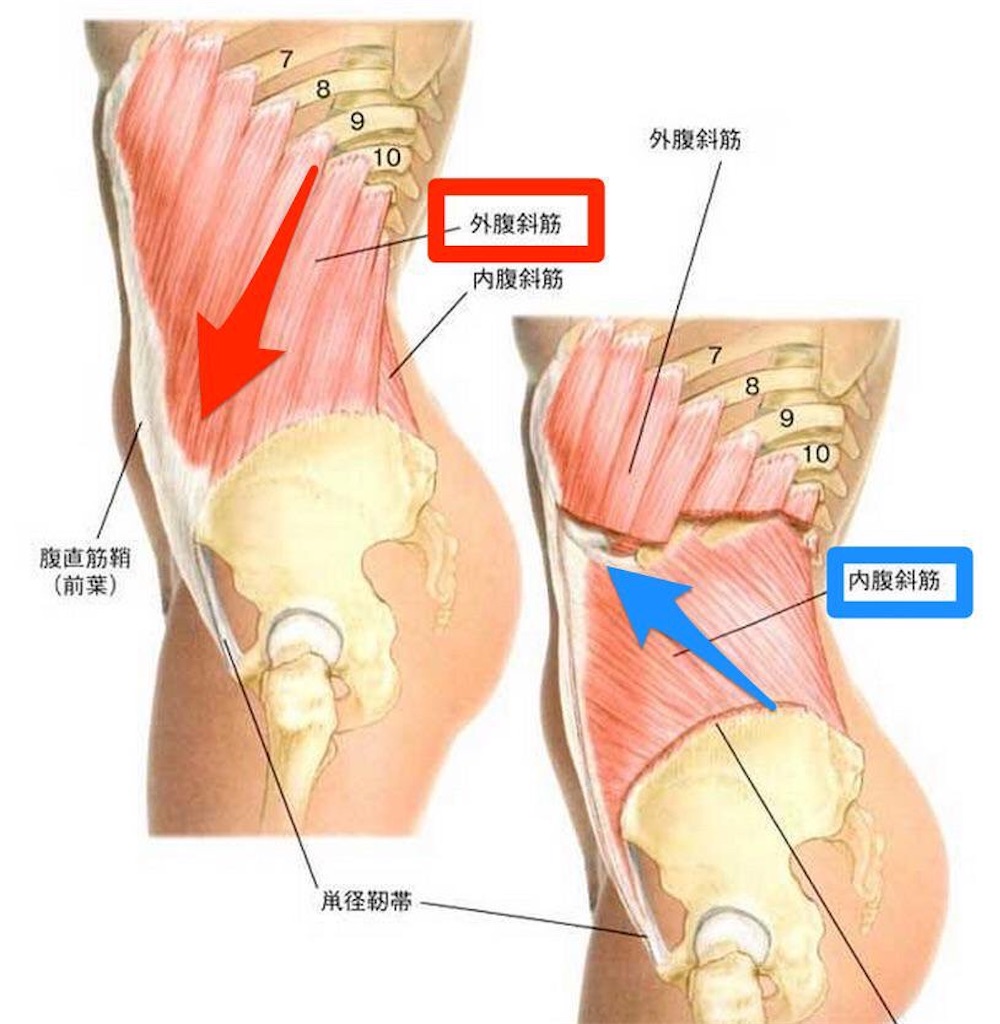
画像出典 解剖生理学勉強法.biz/kyouzai
"External oblique" is the muscle which covers over an abdominal part in the surface layer. Its direction of muscle fibers gose down.
"Internal oblique" is the muscle which exists between transversus abdominis muscle and External oblique in the deep layer. Its direction of muscle fibers gose up.
If you want to get a beautiful waist, you should train Internal oblique because it's around waist.
◻️To enhance Internal & External oblique
To enhance them, these three types of pose would be helpful.
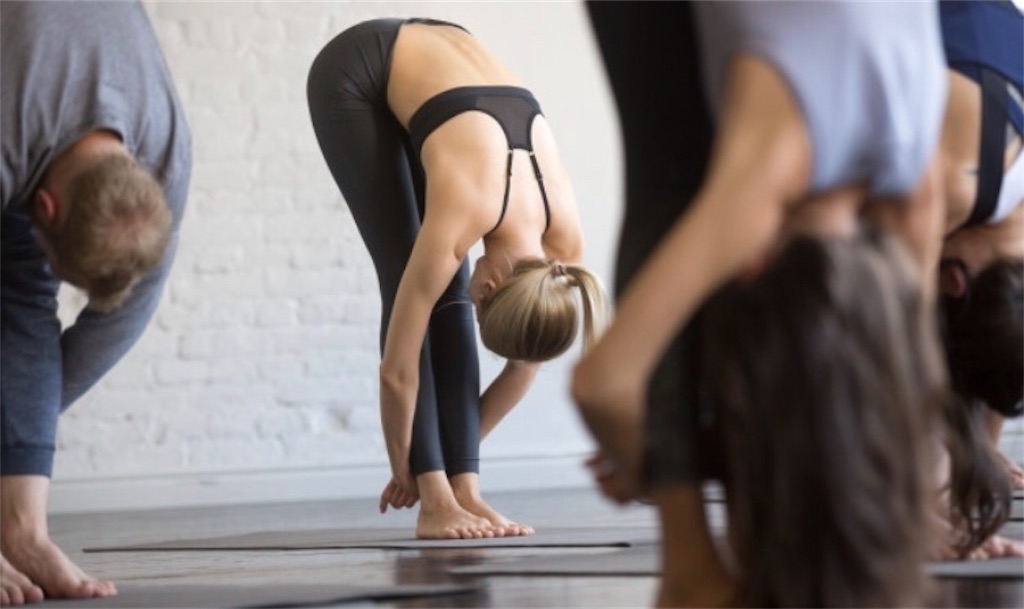
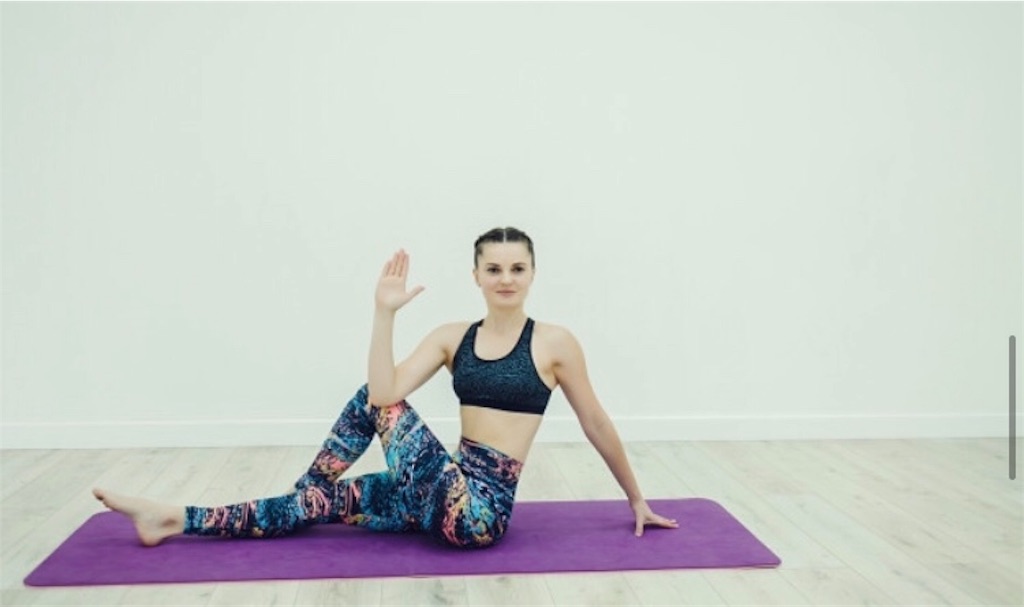
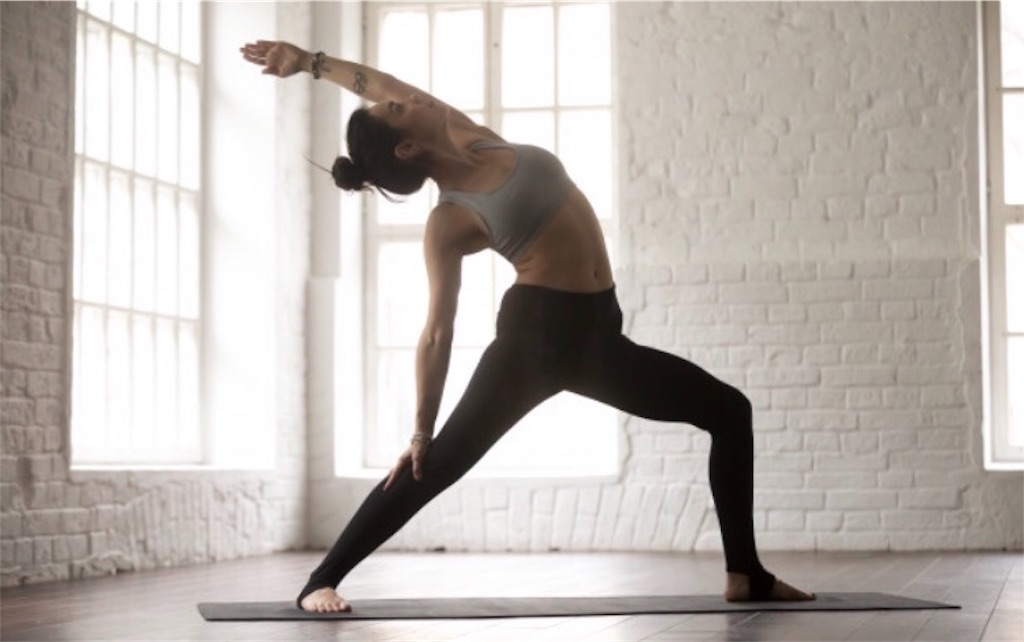
designed by freepik.com
◻️Clear instructions are needed.
As I also mentioned in the last two articles, I suppose the word "abdomen" is a bit vague to understand exactly what the muscle is.
If we just say "abdomen", it doesn't mean there's only one muscle. In fact, there're various muscles.
People might recognize it differently, like how range we should recognize as "abdomen". This fact would make people confused.
So we should instruct using a fine word which people can imagine the connection of muscles instead of the word "abdomen".
I interpreted "abdomen" following.
It starts from a pelvic floor muscle, a hip joint connect the legs and the trunk properly. Then, the diaphragm muscle feel like a corset.
I've tried to put my idea into an instruction below.
❶Put both your hands on the waist and put your little finger along the hip joint.Make sure the angle of pelvic is vertical and the direction of coccyx is almost vertical as well.
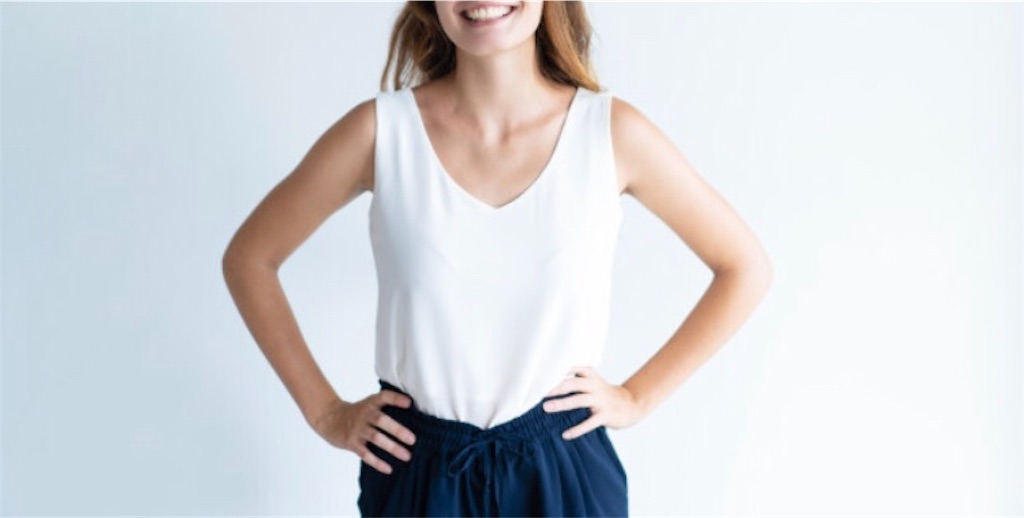
❷Keeping the positions of pelvis and spine, make the area between hipjoint and diaphragm approach to your back.
❸Just imagine that both your underarms are lifted diagonally upward, which makes your scapula goes down, and open your breast.
※For those who have a weak trapezius muscle, trapezius muscle and diaphragm tend to go forward. (I'm a typical type of this. It used to cause an needless pressure on the diaphragm.)
Having said that, it's mostly based on just my though, I'm wondering if it's easy to understand for client.
I really want to share the idea with other instructors, or watch the reaction of client. I'll keep thinking of the better instruction.
Thank you for reading this all!
#17 腹圧-Abdominal pressure②
English follows Japanese
(Let me apologize in advance there might be some grammatical mistakes below.)
こんにちは。
ヨガインストラクターのuriです。
前回に引き続き「腹圧」について考えていきたいと思います。

designed by freepik.com
◻️歪みの判定方法・ニュートラルとは?
前回の記事でも触れましたが、腹圧の入れ方は「生徒さんの身体の歪み方によって異なる」と思います。
「骨盤前傾」であれば、まずはお尻を締めつつ脚を外旋方向に向け骨盤をニュートラルにセットするし、「骨盤後傾」であれば、逆方向の動きが必要になります。
姿勢の土台である「骨盤」が間違ったポジションで固定されているので、その上に乗る「体幹」も間違ったコンディション…縮んでいたり伸びていたりすることが多いです。

designed by freepik.com
これをニュートラルな本来の状態に戻した上で、正しく腹圧を入れなくてはいけません。その為にはまず、自分自身の歪みを自覚する必要があります。
↓歪みのない、ニュートラルな姿勢です。

そしてご自身が「骨盤前傾(反り腰型)」なのか「骨盤後傾(猫背型)」なのかを知るためには、
壁から少し離れたところで普段通り自然に立ち、そのまま壁側へ後ずさりすることで判定することができます。(詳しくは別の機会で…)
◻️正しい腹圧+自然な呼吸
正しく腹圧をセットするために必要な筋肉は、「腹直筋」「腹横筋」、
そして、自然な呼吸も両立させるためには、その間にある「内腹斜筋」「外腹斜筋」の活性化がとても重要です。

「腹圧を入れる」=最も表層にある「腹直筋」にのみ力を入れる意識に(私は)なりがちですが、そうすると呼吸がしづらくなります。
なぜなら、呼吸をする際に腹筋群が働く順序は、深部から①腹横筋、②内腹斜筋、③外腹斜筋、④腹直筋、と言われているからです。
最初に④が硬くなることで、本来働くべき①〜③がスムーズに働かなくなり、呼吸がうまくできなくなるのでは…と個人的に考えています。
次回は、この内・外腹斜筋にフォーカスしつつ、これらの筋肉を活性化するヨガポーズ、さらにどんなインストラクションが効果的なのかを、頭を悩ませながら考えてみたいと思います!
----------------------------------------------------------------
#17 Abdominal pressure②
Hello, everyone.
I'm uri, a yoga instructor.
Let's consider the abdominal pressure.

designed by freepik.com
◻️The way to know how warped you are
As I mentioned in the last article, I think the way of abdominal pressure depens on how warped our bodies are.
If "The pelvis leaned forward"
Lead your legs to external direction and make pelvis neutral.
If "The pelvis leaned backward"
It needs the opposite way of abve.
If the pelvis which is the basis for posture is fixed wrongly, the waist based on that would be also like that, which means the waist would be extended or contracted.

designed by freepik.com
To correct them to the neutral position and place abdominal pressure on correctly, you should recognize your warped body.
First of all, I'll show you how the neutral condition is.

To check if the pelvis is neutral, leaned forward" or leaned backward…
Stand naturally, and go backward to the wall keeping posture, and you'll see it by comparing with the neutral condition.
◻️Correct abdominal pressure+Natural breath
It's quite important to activate "abdominal rectus muscle" and "transverse abdominal muscle" for setting correct abdominal pressure.
And it's also necessary to use "internal oblique muscle" and "external oblique muscle" which are between "abdominal rectus muscle" and "transverse abdominal muscle" for breathing naturally.

If you think that you should contract particularly abdominal muscle which is most surface one, It might disturb your breathing.
Because it's generally said that the order of muscles which are used in breathing is, from deeper layer, ①transverse abdominal muscle ②internal oblique muscle ③external oblique muscle ④abdominal rectus muscle.
We can't breathe well because these above ①〜③ which are supposed to be activated are not used properly, I personally think.
I'll continue this topic next article focusing on internal and external oblique muscle, thinking of effective pose and instructions.
Thank you for reading this all!
#16 腹圧-Abdominal pressure①
English follows Japanese
(Let me apologize in advance there might be some grammatical mistakes below.)
こんにちは。
ヨガインストラクターのuriです。
ヨガのクラス中「腹圧をいれる」というキューが出たとき「これで合ってるのかな?」と気になることはありませんか?
「お腹をしまい込む」
「腹圧をいれる」
「お腹を引き入れて、引き上げる」
インストラクターによって様々な言い方がありますし、私自身もどう表現したら良いかな〜と考えていました。

designed by freepik.com
◻️腹圧を維持する「腸腰筋」「腹横筋」
まずは腸腰筋。大腰筋と腸骨筋の総称で、大腿部と腰椎(体幹部)を繋ぐ筋肉です。この筋肉がきちんと働かないと、骨盤は安定しません。
次に腹横筋。この筋肉の効果は「腹圧をあげる」「強制的に息を吐く」「姿勢保持」「体幹部の安定」です。
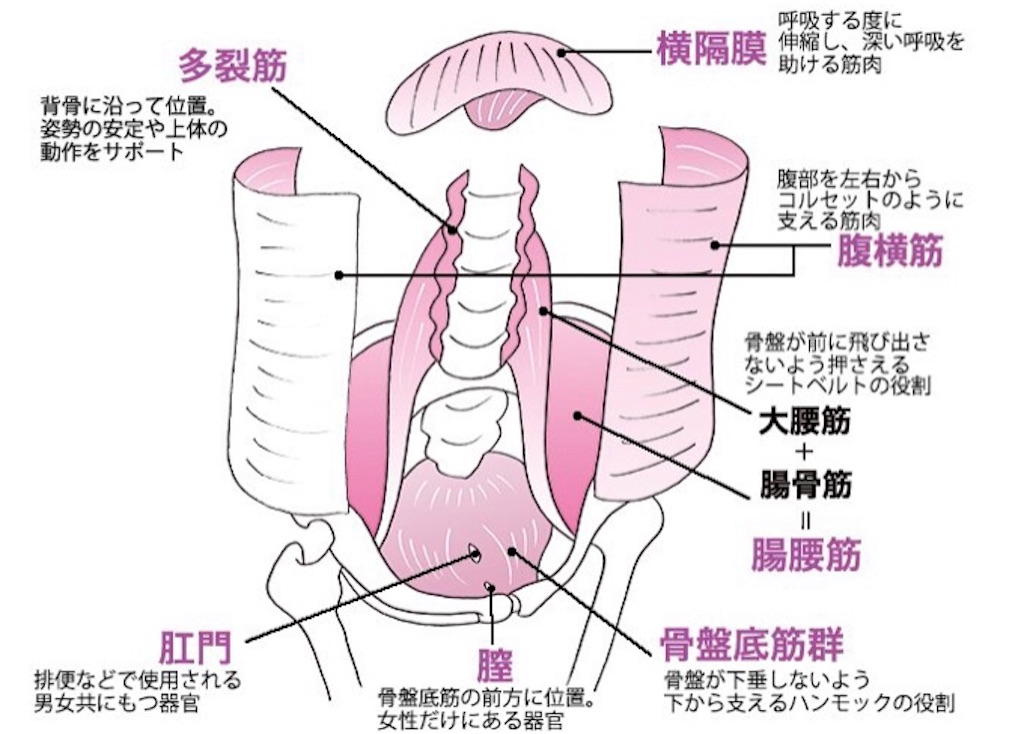
画像出典:www.biteki.com/life-style/body-care/352723
ご自身の「腸腰筋」「腹横筋」を想像しながら「恥骨部から胸椎部までが縮まずに、まっすぐな状態か?」を意識してみてください。
もし縮んでいた場合は、腹直筋の柔軟性&脊柱起立筋の筋力が低下しています。
とはいえ、歪みが常態化していると、自分で縮んでいるかどうかの判定も難しいと思います。
◻️どのように「腹圧」を導引する?
個人的な考えとしては「生徒さんの身体の歪み方によって異なる」と思います。
生活習慣や体つきは人それぞれですので、厳密に言えば歪み方も千差万別ですが、大きく分けて「骨盤前傾(反り腰型)」か「骨盤後傾(猫背型)」に大別できます。
ちなみに私は「骨盤前傾(反り腰型)」。ニュートラル時に比べて、お腹が伸びて、背中が縮んでいる状態=胸郭部と恥骨部がニュートラルよりも離れている状態です。

designed by freepik.com
「骨盤前傾(反り腰)」の原因も人によって異なりますが、一般的には腹部の筋力低下と、背部の柔軟性低下によるものとされています。
これをニュートラルな本来の状態に戻した上で、正しく腹圧を入れなくてはいけません。その為にはまず、自分自身の歪みを自覚する必要があります。
いつもより、少し文量が多くなりました…!
次回以降は、歪みの判定方法、腹横筋・腹直筋を刺激するヨガポーズなどなど、更新させていただきます。
----------------------------------------------------------------
#16 Abdominal pressure①
Hello, everyone.
I'm uri, a yoga instructor.
Do you ever wonder if you are posing correctly when you hear the instruction "abdominal pressure".
There're various expressions by instructors. I'm still thinking of the better one.

designed by freepik.com
◻️To maintain "abdominal pressure
First of all, about "iliopsoas muscle". It's the general term for "psoas major muscle" and "iliac muscle", which connects the hip joint and waist. The pelvis can't be stable without this muscle.
Next, about "transverse abdominal muscle". This muscle has some effects like "abdominal pressure", "breathing strongly", "keeping good posture" and "maintaining waist".

出典:美的https://www.biteki.com/life-style/body-care/352723
I'd like to recommend you to feel carefully that the condition from pubis to thoracic vertebra is moderately straight instead contracting with "iliopsoas muscle" and "transverse abdominal muscle".
If it's been contracted, it means the flexibility weakness of the rectus muscle and the erector spinae. However, it might be difficult to discover the warped condition if it's already been natural for you.
◻️How to lead it
It depends on how warped the client's body is.
Strictly speaking, that are various according to daily life habit, the innate body construction or something like that. But the types of warp body can be divided into big two groups, "The pelvis leaned forward" and "The pelvis leaned backward".
By the way, I'm the type of "The pelvis leaned forward", which abdominal is extended compared with the neutral one. It's the condition which the pubis is more distant from the chest than natural.

designed by freepik.com
The cause of "The pelvis leaned backward" is also different by people, but generally considered due to muscle weakness of abdominal or flexibility weakness of back.
You should first correct it to neutral position and have abdominal pressure. For that, It's necessary to discover your warped body.
I'll write about the yoga pose to activate "transverse abdominal muscle" and "abdominal rectus muscle", the method of knowing how the warped and neutral body is in the next article.
Thank you for reading this all!
#15 勉強法-How to study yoga①
English follows Japanese
(Let me apologize in advance there might be some grammatical mistakes below.)
こんにちは。
ヨガインストラクターのuriです。
今回は、私がヨガを学ぶ上で参考にしている書籍をご紹介します。

まずは1冊目。ベルギー在住のため、Kindleで購入しました。タイトルの通り、姿勢と動きの関連性がとても分かりやすいです。
「屈曲・伸展、外転・内転、挙上・下制」などなど…専門用語が多く出てきますが、その点は抵抗なく読み進めることができました。
というのもRYT200の講義で、先生から度々「このポーズの肩甲骨は?」と問われ「下制!」と答えるといった訓練をしていたからです。

あの時の独特の緊張感が懐かしく、またそれによって「自分で考えるクセ」を養って頂いていたんだなぁと、改めてありがたく感じました。
主働筋と拮抗筋、起始と停止などの基本的な考え方も学ぶことができ、より一層理解を深めるための第一歩として、最適な一冊かと思います。
加えて筋力や柔軟性の評価法も書かれており、自分のヨガクラスでも活かしたいと考えています。
↓学んだことを、このように整理しています。

↓いつかパーソナルクラスを持ってみたいので…評価法も勉強しています。

この他にも参考にしている書籍がいくつかあります。(とはいえ、もっともっと実践しなければ…!)
また別の機会で紹介させて頂きます。
----------------------------------------------------------------
#15 How to study yoga
Hello, everyone.
I'm uri, a yoga instructor.
Let me introduce you my favorite book for learning yoga.

I bought this book on Kindle because I live in Belgium. As its title says, it helps us understand the structure of posture and physical movement.
(Its title is "You can see the structure of posture and physical movement by this book")
There're some technical terms in this book, but I didn't have big difficulty to keep reading.
Because, in school from where I've got RYT200 , we used to answer immediately many questions from teacher. She asked us like "How the shoulder bone is like in this pose? ", We quickly answered to that.

Looking back, I'm so grateful again to my teachers and my mates! We really concentrated on this RYT course in a nervous mood. I was encouraged to consider by myself. It was great for us.
I think this book would be the best one for the first step, which you can learn the basic things.
In addition, you can also get the evaluation method of muscle and flexibility. I'd like to use these knowledges properly in my yoga class.
↓I make notes to understand more deeply

↓I also study the evaluation method because I'd like to provide a personal lesson in the future.

I have any other books I recommend you. (Having said that, I must do a real lesson more and more...)
I'll introduce them on another occasion. Thank you for reading this all!
#14 柔軟性-Flexibility
English follows Japanese
(Let me apologize in advance there might be some grammatical mistakes below.)
こんにちは。
ヨガインストラクターのuriです。
今回のテーマは「柔軟性」。一般的に「身体が柔らかい=正しいポーズがとれる」というイメージがありますが、一概にそうとは言えないかもしれません。

designed by freepik.com
◻️柔軟性がある人ほどケガしやすい?
生まれつき柔軟性があり、難なくポーズがとれるような方は、無意識に「過可動」となりケガをしやすいそうです。
私も比較的身体が柔らかいので、ヨガを始めて間もない頃は、柔軟性にばかり頼って体を曲げたり、そらしたりしていました。
よく先生に「体幹を使えていない」と、個別にキューイングを頂いていたなと思います。
ただ難しいのは、型としてはポーズがとれているように見えるし、自分自身「体幹を使ったポーズ」を体感したことがないため、なかなか「過可動しているな」と自分で気がつけないこと。
これを防ぐためには、関節まわりの筋肉を鍛え、柔軟性と筋力を均等に発揮しながら、調和のとれた状態を作っていく必要があります。
重要なのは「柔軟性」と「筋力」のバランスです。
◻️ヨガ+筋トレの相乗効果
日頃のヨガにほんの少しのウェイトトレーニングを加えるだけで、より力強くポーズに取り組め、さらに体力の維持にも役立ちます。
筋肉を鍛え、骨密度を増やし、身体のバランスを保つ、ということですね。
私自身も、チャトランガでは腕がプルプルしたり、立位のポーズでは下肢がプルプルして持久力がなかったりと「筋力が足りないな…」と感じることが多々ありました。

designed by freepik.com
それでも先生が都度くださるアジャストを参考に、少しずつでも体幹を意識して、自分の体に負荷をかけてみる。
それは決して強い負荷ではなく、自分が心地よい範囲で、例えばキープ時間を少しだけ長くしてみるだとか、踏み込みをもう一段階強めてみるだとか。
そうしたちょっとずつの積み重ねで、徐々に筋肉を使ったヨガのコツを掴んでこれたように思います。
ヨガで正しく使えば、筋肉も育っていきます。鍛える意識をもつことも、ヨガを楽しむコツかもしれません。
----------------------------------------------------------------
#14 Flexibility
Hello, everyone.
I'm uri, a yoga instructor.
If you think that you're flexible physically, perhaps it's better to be careful.

designed by freepik.com
◻️Those who are flexible tend to…
Those who have an innate flexibility to pose easily, they tend to move excessively and hurt unconsciously.
I used to bend myself backward only relying on flexibility when I first started yoga.
The teacher often advised me like "You should use the core muscle."
But it's difficult to recognize that by ourselves because we seem to pose well in appearance and we don't know exactly how the pose is like with core muscle.
To prevent that, it's necessary to make a well-balanced body with enhancing your muscles around joints.
The balance between the flexibility and the strength of muscles is essential.
◻️Multiplier effect of yoga & training
It would be helpful to keep strength which decreases as we get older with adding something like training to the yoga lesson.
It means enhancing muscle, improving bone density and restoring body balance.
I sometimes find that I don't have enough strength to pose plank or standing even if I suppose that I'm flexible.

designed by freepik.com
However, you should place a little stress on your body with using core muscle by teacher's advice.
It's not too high stress, but moderate one. For example, keep posing longer or stepping your foot one more stronger.
I think I could catch how to do yoga with muscle every time I improved my way of yoga.
Doing yoga correctly can activate your muscle. lt might be good to have an idea of training when you do yoga.
Thank you for reading this all!
#13 手の小指-Little finger
English follows Japanese
(Let me apologize in advance there might be some grammatical mistakes below.)
こんにちは。
ヨガインストラクターのuriです。
前回は「足の小指」でしたが、今回のテーマは「手の小指」。あわせて脇周辺の筋肉群も勉強していきます。

designed by freepik.com
◻️「小指」って、普段使えてないかも?
以前通っていたパーソナルトレーニングジムで教えて頂いたことです。(ミスユニバースの指導もする有名なジムです)
「二の腕を細くしたい!」と伝えたところ「ハンドバッグを持つ時に、小指をぎゅっと握ってみてください」
とのアドバイス。理由は分からないまま、早速小指に力を入れてみると…脇の下がきゅっと締まる感覚が!

designed by freepik.com
◻️二の腕を引き締める筋肉とは?
「二の腕を引き締めたい!」と思った場合、二の腕そのものを細くしたい!というのはもちろんですが、
その下にある脇のお肉(ハミ肉)も要らないなぁ…と思いませんか?ということで、脇周辺の筋肉「小円筋」にも着目していきましょう。
話を戻すと…小指に力を入れた時、連動して力が入ったと感じた部位は「小円筋」のあたりでした。(もし解剖学的に間違っていたらご教示ください。)
小円筋は回旋筋腱板(ローテーターカフ)と呼ばれる筋肉腱群に属しており、三角筋と僧帽筋の内側に隠れている部位です。なんだか鍛えづらそうですね…!

小円筋は、主に肩関節の外旋(腕を90度に曲げ、肘から下を外側へ動かす動作)と伸展(体よりも後ろに下げる動作)を担当しています。
小指をぎゅっとすると、かすかではありますが、腕に外旋方向の力が働くように感じませんか?
以前取り上げた「ストレートネック」とも関連するのですが、現代人は巻き肩が多いのではないかと思います。巻き肩=腕が常に内旋方向、ですよね。
さらにスマホをはじめとして親指を多く使うため、小指を使う機会があまりない=腕が外旋方向に向くチャンスが少ない、と言えるのではないでしょうか。
(↑調べてもピンポイントな情報が得られなかったので、あくまで私の考察ですが)

designed by freepik.com
「あまり小指を意識したことなかったな」という方は、ぜひヨガの一つ一つの動作時に小指側に意識を向けてみてください。
例えば、指をピーンと下に下ろす時。5本の指で床をとらえるとき。小指側を意識するだけで、「小円筋」など、いつもと違う筋肉が活性化されるかもしれません!
----------------------------------------------------------------
#13 Little finger
Hello, everyone.
I'm uri, a yoga instructor.
The theme of last article was "the little toe", but I chose similar one, "the little finger". I'll consider the structural relations between the little finger and under arms muscle.

designed by freepik.com
◻️Are you sure that you can use little finger?
I had been going to the gym in Ginza for six months, which was famous for personal trainer. They help some women who are intend to take part in Miss universe.
I asked the trainer how to make upper arms look well. Then, he advised to me like "Please try to grasp your handbag with little finger strongly."
I did it immediately as he said, I felt that underarms got contracted.

designed by freepik.com
◻️Which part of muscle for toning the upper arms?
It's much more effective to tone the underarm muscles as well as the upper arms. Then, look at the teres minor muscle around the underarms.
Back to the point, I noticed that "the teres minor muscle" and "the serratus anterior muscle" were toned while grasping especially little finger. (It's just my idea. if wrong in terms of anatomy, let me know that.)

"The teres minor muscle" is under the trapezius muscle, which is grouped in the category of rotator cuff. It sounds hard to tone muscle, doesn't it?
We can move shoulder bone in external rotation(=bend arms at angle of 90° and move the part of arm below elbows outward) and in backward extension(=move them backward).
Do you feel slightly that arm moves outward while grasping the little finger?
It's related to the topic "text neck" which I mentioned before, a lot of people tend to have a bad posture moving their shoulder forward, which means keeping arms internal constantly.
Moreover, we don't have much opportunity to use little fingers because we use the mobile phone or something like that especially by thumbs. That means arms rarely face to external side. (It's just my view. I couldn't find any info about that.)

designed by freepik.com
For those who were unconscious for little finger so far, let's be careful to use it for each yoga pose. For example, when you stretch fingers straight down or when you grasp the floor by all fingers.
It can activate your muscles which are always calm like the teres minor muscle.
Thank you for reading this all!
#12 足の小指-Little toe
English follows Japanese
(Let me apologize in advance there might be some grammatical mistakes below.)
こんにちは。
ヨガインストラクターのuriです。
皆さんは、足裏のどの部分が地面に着地しているか、意識したことはありますか?今回のテーマは「小指とお尻(大臀筋)」です。

designed by freepik.com
◻️足の小指と、お尻の関係
今回このテーマを選んだのは、私自身の何気ない体験がきっかけでした。ふと足裏を見ると、親指側に角質が…。
「足裏3点を均等に踏むように意識してたつもりだったけど、親指側に体重がかかってたのか…」
と思いつつ、かなり意識的に小指側を地面に押し付けてみたところ…お尻にきゅっと力が入る感覚が!
ヨガを始めてからは足裏3点を意識してきたつもりでしたが、実際には親指側に偏って体重をかけていたようです…。
小指が使えていないと、太ももの前側や外側をよく使う傾向になりやすく、足がパンパンになるそうです。涙

designed by freepik.com
◻️足の小指と、下肢のコンディション
さらに、自分の下肢を観察してみました。
親指側に偏って重心がかかると、左右の下肢が内側(親指側)へ倒れこみます。そうすると膝も内側に向いて、お尻の後ろ側(大臀筋)が左右外へ伸びきってしまう感覚がありませんか?X脚のような脚の型になるかと思います。
逆に小指側をしっかりと踏み込むと、左右の下肢が正面、それと連動して膝が正面に向き、お尻の後ろ側が自然と引き締まるのが感じられました。
◻️小指の病気、内反小趾
小指は小さい骨なので、すぐに変形してしまうそうです。内反小趾とは、足の小指が外側に曲がる病気です。小指の曲がった部分が靴にあたるため炎症を起こしたり、タコやウオノメができて痛むこともあります。
予防法は、足の指の筋力強化と、足の向きの矯正!下図のような「足指ストレッチ」が有効です。ヨガのウォーミングアップでも、足の指をぐーぱーしたり、手の指と握手させたり、足の緊張をとってリラックスさせますよね。

済生会ホームページより
正しい知識をもって自分の体を見つめ直すことも大切ですし、自分では気づくことができない歪みについて、プロの手を借りるのも有効です!
「歩き方」についても、これからさらに学んでいきたいと思います。
----------------------------------------------------------------
#12 Little toe
Hello, everyone.
I'm uri, a yoga instructor.
Did you ever pay any attention for which part of your feet touching the ground? The reason why I chose this theme "little toe" for this article is due to my real experience.

designed by freepik.com
◻️The relationship between little toe and hip
One day, I found the skin of thumb toe becoming firm. I wondered why it became like that because I was alway conscious for using the back of feet properly.
I found my hip muscle become firm when I stepped little finger strongly.
I thought that I tried to step on the side of little toe, but that's not true. In fact, I stepped on the side of thumb toe.
If we couldn't use little toes well, we tend to use the front and outside of thigh frequently. It'll make our legs bigger, which might be unhappy for women.

designed by freepik.com
◻️The condition of legs
Moreover, I carefully watched my legs. Stepping forward the side of thumbs, the legs moved to inside together. Then, the knees also did that, and I felt gluteus medius was too extended.
On the other hand, when I did opposite action, both your legs and knees could face forward. I felt my hip becoming firm moderately.
◻️Digitus minimus varus
Digitus minimus varus is the disease of little toe which makes it bend to the other side. It sometimes causes the inflammation due to touching the inside of shoes. It's so tiny bone, so it can change form easily.
To prevent it, it's helpful to "enhance the strength of toe's muscle" and "correct the direction of feet".
The picture below illustrates how to do that. I guess you always do it as an warm up for yoag to relax fingers.

済生会ホームページより
It's helpful to learn how to do properly, and it's also effective to care about your body. You also can ask professional person for an advice to know the warped part of your body!
Thank you for reading this all!